This is a simple circuit to control a cooling fan. In order to build
this control, you will need basic electrical skills, including
soldering.
WARNING, this project uses 120V line current, and must be assembled with
care. I have built this circuit several times to control the cooling fans
in my home and greenhouse, (it would work in an attic ventilation fan as well).
It requires a few items readily available at your local hardware and
electronics store.
Materials:
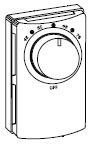
A double pole line voltage thermostat
(a baseboard control is perfect) |
 |
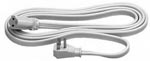
| 16 gauge extension cord, 15-25' |
 |
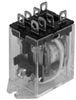
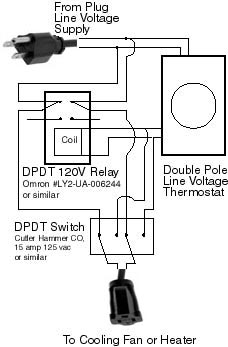
DPDT 120V 10amp relay
Omron #LY2-UA-006244 or similar |
 |
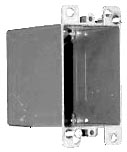
| Standard Electrical box, plastic deep box is a good choice |
 |
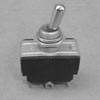
DPDT 15 amp 125V AC Toggle Switch
optional, this will allow this cord thermostat to be used for a small
electric heater also |
 |
Electrical tape, solder, nylon cable ties.
Tools:
Soldering iron, wire cutters, utility knife
 First,
consider the location of the fan and where you want to locate the
thermostat. When you buy the cord, pick one that will be long enough to go
from a continent outlet, then to a suitable location for the thermostat, then
long enough to reach to the fan to be located in a window. Don't get an excessively
long cord.
First,
consider the location of the fan and where you want to locate the
thermostat. When you buy the cord, pick one that will be long enough to go
from a continent outlet, then to a suitable location for the thermostat, then
long enough to reach to the fan to be located in a window. Don't get an excessively
long cord.
start by plugging in the cord, then run it to the thermostat location then to
the fan. Mark the cord where the thermostat is to be located.
Unplug the cord from the wall. Cut the cord at the mark, and feed the
wires through the back of the electrical box. Strip the wires, and connect the
power supply from the extension cord to the line in on the thermostat.
Connect the NC (normally closed) contacts on the relay to the line in.
Solder these connections.
Connect the line out of the power cord (to fan) to the common contacts on the
relay, solder these connections.
Them connect the thermostat out to the coil on the relay, solder
this connection.
Carefully inspect all the connections, looking for proper tight joints, completely
insulate all the the exposed contacts on the relay and thermostat with
electrical tape. Anchor the cords in the electrical box with zip
ties. Tuck the relay and excess wiring into the box and screw the
thermostat to the box.
OPTIONAL - if you add the double pole double throw switch, your thermostat circuit
can be used to control a heater in the winter time. This has the advantage
over the built in thermostats on these heaters, because it is far enough away
from the heater as to more accurately control the heater.
How it works.
When the thermostat is set to say 70 degrees and the house is 80 degrees, the
thermostat is off thus the coils on the relay are de-energized. The NC
(normally closed) contacts of the relay are connected to the common
contacts. This allows the current from the line in to pass and the fan
will run. When the house has cooled below 70 degrees, the thermostat will
turn on, energizing the relay and will turn off the fan. This simple
circuit will keep the fan from running after the set point has been reached.